How to Choose the Best Paving and Concrete Professionals

Whether you are looking to upgrade your home’s exterior, construct a brand-new commercial facility, or simply fix a deteriorating surface that has become an eyesore and a safety hazard, a paving project is a massive undertaking. The surfaces you walk, drive, and park on are foundational elements of your property’s structural integrity and overall value. A high-quality installation can easily last for decades, boosting curb appeal and providing a safe, functional environment. Conversely, a poorly executed job can become a financial nightmare, leading to structural failures, property damage from improper drainage, and the need for a total replacement long before the material’s expected lifespan is reached.
Unfortunately, finding the right professional to handle this critical work can often feel like navigating a minefield. The construction industry is filled with highly skilled craftsmen who take immense pride in their work, but it is also populated by inexperienced operators who cut corners to offer the lowest possible price. When you hire the wrong team, the consequences are rarely visible on the first day. A surface might look perfect when it is freshly laid, only to reveal catastrophic flaws a few months later when the seasons change. Water might begin pooling in the center instead of running off into drains, hairline cracks can rapidly expand into massive fissures, and crumbling edges can turn your expensive investment into a neighborhood eyesore.
This comprehensive guide is designed to remove the guesswork from the hiring process. By following a systematic, informed approach to vetting, interviewing, and selecting a professional, you can protect your property and your wallet. In the following sections, we will walk you through exactly what you need to know—from clearly defining your project scope and understanding the critical importance of sub-base preparation, to verifying legal credentials and planning for long-term maintenance.
Map Out the Specifics of Your Paving Project Early

Before you even begin searching online for local professionals or asking your neighbors for recommendations, it is absolutely essential to sit down and clearly define the scope and specifics of your project. Going to the market with a vague idea of what you want leaves you vulnerable to upselling, miscommunication, and vastly different price estimates that are impossible to compare side-by-side. You need to become the project manager of your own property before handing the reins over to a contractor.
The first step is to precisely determine the primary use case for the surface you intend to build or replace. Not all surfaces are created equal, and the engineering requirements change drastically depending on what the pavement will endure. Are you planning a residential walkway that will only ever see foot traffic? Are you installing a standard two-car driveway for daily commuter vehicles? Or are you responsible for a commercial loading dock that will sustain the immense, concentrated weight of fully loaded eighteen-wheelers? The load-bearing requirements will dictate the thickness of the base materials, the specific mix of the top surface, and the type of reinforcement required.
Specialization matters immensely in this industry. A crew that excels at one type of job might struggle significantly with another. For example, if your primary goal is to create a highly decorative, stamped, and stained outdoor living area in your backyard, you will want to seek out specialized patio contractors who have a proven eye for artistic detail, color blending, and intricate finishing techniques. On the other hand, if you are laying a massive, fifty-thousand-square-foot foundation for an industrial warehouse, those delicate finishing skills are irrelevant. Instead, you need a large-scale concrete company that possesses the heavy machinery, massive crew size, and logistical coordination necessary to handle continuous, high-volume pours without cold joints.
To ensure you can communicate your needs effectively, gather the following specifics before making your first phone call:
-
Accurate Measurements: Do not guess the size of your project. Use a measuring tape to determine the approximate square footage. Even a rough estimate helps a contractor understand the scale of the job before they arrive for a site visit.
-
Property Lines and Utilities: Identify your exact property boundaries to avoid encroaching on municipal land or neighboring yards. Furthermore, locate underground utilities (gas, water, electrical) or plan to have a local utility service mark them before any excavation begins.
-
Drainage Goals: Note where water currently flows during a heavy rainstorm. Identifying existing drainage problems will help you and the contractor plan for proper grading and runoff solutions.
-
Contingency Budgeting: Research baseline material costs in your region to set a realistic budget. Crucially, always set aside a contingency fund of 10 to 15 percent above the estimated cost. Once a contractor tears up an old surface, they may discover soft soil, decaying organic matter, or a completely failed sub-base that requires additional, unforeseen excavation and grading.
Prioritize Proven Local Experience Over Low Bids

Once you have a clear understanding of your project’s parameters, the next phase is gathering bids and vetting potential candidates. One of the most dangerous traps a property owner can fall into is automatically selecting the lowest bidder. In the paving and construction world, materials and labor have a fixed baseline cost. If one estimate is drastically lower than the others—sometimes by thousands of dollars—it is almost guaranteed that the contractor is making up that difference by cutting corners in ways you cannot easily see.
A dramatically low bid usually points to several alarming practices. The contractor might plan to excavate less dirt, saving on hauling fees but leaving a compromised foundation. They might reduce the thickness of the crushed stone base or the final surface layer, meaning a driveway meant to be three inches thick ends up being only an inch and a half. They may use a lower grade of materials, skip necessary reinforcements like steel rebar, or rely on inexperienced, unskilled day laborers rather than trained tradespeople. Any of these shortcuts will significantly reduce the lifespan of your surface, turning a “cheap” job into an incredibly expensive failure when it has to be torn out and redone in two years.
Instead of focusing solely on the bottom line, your primary criteria should be proven, hyper-local experience. Soil composition, frost lines, and weather patterns vary wildly from one region to another, and materials react dramatically to these environmental factors. For example, local asphalt companies understand exactly which mix design is required to withstand the specific temperature fluctuations of your city, and they know the optimal seasonal windows for laying the material so it sets properly. Similarly, experienced regional concrete contractors will know the exact chemical admixtures necessary to prevent their pours from freezing in a northern winter or curing too rapidly and cracking in a blistering southern summer.
When evaluating a contractor’s local track record, you must go beyond simply reading online reviews. You need to actively investigate their past work.
-
Examine the Portfolio with a Critical Eye: Do not just look at the overall picture. Zoom in on the details. Look at the edges of the pavement—are they crisp and clean, or crumbling and uneven? Look at how the new surface meets existing structures like garage floors, sidewalks, or retaining walls. The transitions should be completely seamless and perfectly flush to prevent tripping hazards and water pooling.
-
Demand Recent References: A reputable professional should be eager to provide a list of past clients. When you call these references, ask specific, probing questions.
-
Key Reference Questions:
-
“Did the crew show up on time and maintain a clean, organized job site?”
-
“Were there any hidden fees or surprise charges added to the final invoice?”
-
“How did the company handle communication when unforeseen issues arose?”
-
“Has the surface survived a full cycle of extreme weather (a harsh winter or a scorching summer) without cracking or settling?”
-
-
Visit Past Job Sites: If a contractor has completed work in your neighborhood or a nearby public area, take a drive to see it in person. Seeing a surface that has endured a few years of actual use and weather will tell you far more about the contractor’s workmanship than a photo of a freshly completed project.
Demand Proof of Credentials and Protection
One of the most critical, yet frequently overlooked, steps in choosing a professional is verifying their legal credentials and financial safety nets. Construction sites are inherently dangerous places, involving heavy machinery, volatile materials, and intense physical labor. If a contractor is operating without the proper legal and financial protections, the property owner can be held entirely liable for accidents, injuries, or property damage that occurs during the project. Never simply take a contractor’s word that they are “fully licensed and insured.” You must demand physical proof and verify it independently.
First, check the licensing requirements for your specific state, county, and municipality. In most jurisdictions, performing heavy structural exterior work requires specialized trade licenses. Reputable asphalt contractors will usually have their license numbers prominently displayed on their company vehicles, their website, and right at the top of their written estimates. You should take that number and cross-reference it with your local licensing board’s online database to ensure it is current and in good standing, with no unresolved complaints against the business.
Insurance is the next non-negotiable factor. There are two distinct types of insurance you must verify: General Liability and Worker’s Compensation. General liability insurance protects you if the contractor damages your property—for example, if a heavy dump truck backs into your home or a piece of excavation equipment accidentally severs a municipal water line. Worker’s compensation is equally, if not more, important. If you hire a residential asphalt driveway contractor and one of their crew members suffers a severe injury while working on your property, worker’s compensation covers their medical bills and lost wages. If the contractor does not carry this insurance, the injured worker could easily sue you, the homeowner, for damages, potentially putting your home and personal assets at immense risk.
Always ask the contractor to have their insurance provider email you a Certificate of Insurance (COI) directly. This prevents unscrupulous operators from showing you a forged or expired document.
Additionally, you need to understand bonding and warranties:
-
Surety Bonds: A bond is essentially a financial guarantee that the contractor will fulfill their obligations. A “performance bond” ensures the project will be completed according to the contract, even if the contractor goes bankrupt mid-job. A “payment bond” guarantees that the contractor will pay their subcontractors and material suppliers. If they fail to do so, unpaid suppliers can place a mechanic’s lien on your property, legally forcing you to pay for the materials a second time.
-
Comprehensive Warranties: A handshake guarantee means nothing. Ensure that a detailed warranty is written directly into the final contract. Pay close attention to what is actually covered. A robust warranty should cover both the structural integrity of the materials and the quality of the workmanship. It should explicitly state how long the coverage lasts (e.g., one year for surface defects, five years for structural failure) and outline the specific remedies the contractor will provide if the pavement fails prematurely.
Ask Hard Questions About Base Preparation and Curing

The most beautiful, flawlessly finished surface in the world is completely useless if it is poured or laid over a weak, unstable foundation. The secret to long-lasting pavement has very little to do with the top layer; it is entirely dependent on the dirt and rock hidden beneath it. When interviewing potential professionals, you need to ask highly technical, specific questions about their excavation and base preparation processes. A contractor who eagerly explains their sub-base engineering is one you can trust; a contractor who brushes off the question or says “we just level the dirt” is one you should avoid immediately.
The first critical conversation should be about excavation and the sub-grade. The existing soil must be excavated to a sufficient depth to remove all organic matter, topsoil, and soft clay, exposing the hard, stable earth below. Once excavated, this sub-grade must be aggressively compacted using heavy, vibrating drum rollers. If the native soil is particularly weak or retains too much moisture, a geotextile fabric should be laid down to separate the soil from the aggregate base, preventing the dirt from pumping up and destabilizing the rock layer over time.
Next, you must discuss the aggregate base course. This is the thick layer of crushed stone that acts as the primary load-bearing structure and drainage system for the pavement above. You should ask the contractor what size and type of aggregate they intend to use, how many inches thick the base will be, and how they plan to compact it. For standard residential driveways, a minimum of four to six inches of compacted base is typically required, while commercial projects may require twelve inches or more.
Furthermore, you must establish clear expectations regarding the treatment of existing damage if this is not a brand-new installation.
-
Assessing Existing Damage: If you are dealing with an old, deteriorating surface, the contractor must determine the root cause of the failure. If there are only minor surface cracks and slight wear, they might recommend simple, targeted driveway repairs to extend the life of the pavement.
-
When to Tear it Out: However, if there are massive, interconnected cracks (often called alligator cracking), deep ruts, or areas where the surface is sinking, the base has failed. In these cases, patching is a waste of money. The contractor should honestly advise you that heavy concrete driveway resurfacing or a complete tear-out and base replacement is mandatory to prevent the exact same failures from telegraphing through the new surface.
-
Water Management and Grading: Water is the absolute worst enemy of any paved surface. Ask the contractor exactly how they plan to grade the site. The surface must have a minimum slope of 1% to 2% (dropping about one-quarter inch per foot) to ensure water runs off aggressively toward designated drainage areas or the street, rather than pooling in the center or draining toward your building’s foundation.
-
Curing Times and Chemistry: Finally, discuss the timeline for curing. Chemical hydration and cooling processes take time. Ask the contractor for a strict schedule detailing exactly how many days must pass before you can safely walk on the surface, and how many weeks must pass before you can park heavy vehicles on it, ensuring you do not compromise the structural integrity during its most vulnerable phase.
Plan for Future Upkeep and Curb Appeal Enhancements
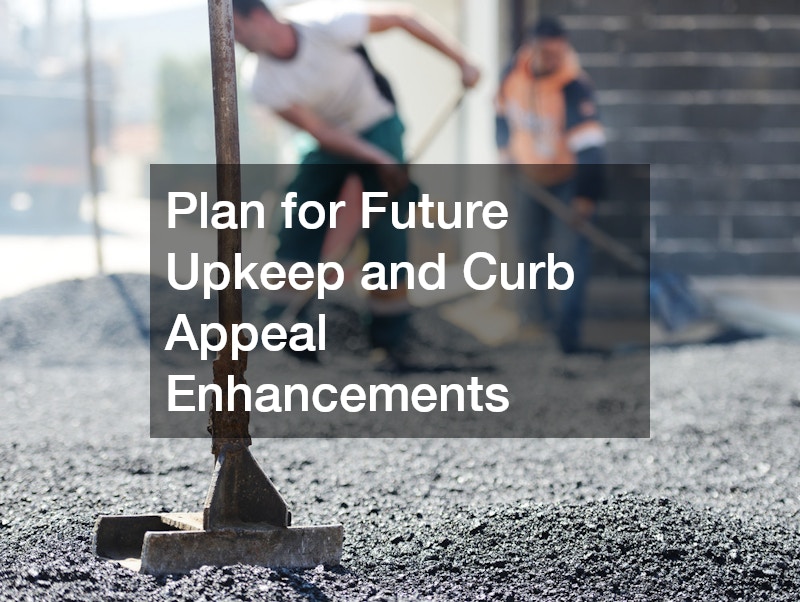
A common misconception among property owners is that once a heavy exterior surface is installed, the project is permanently complete and the surface will care for itself. This “set it and forget it” mentality is a leading cause of premature pavement failure. All exterior surfaces are under constant, relentless attack from the elements. The moment the installation is finished, ultraviolet radiation from the sun begins to oxidize and break down the chemical binders in the material. Rainwater constantly seeks tiny pores and microscopic cracks to infiltrate. In colder climates, this trapped moisture freezes and expands, tearing the material apart from the inside out. Furthermore, daily use subjects the surface to the corrosive effects of leaking vehicle fluids like motor oil, power steering fluid, and antifreeze.
To maximize the return on your investment and ensure your property looks pristine for decades, you must factor long-term maintenance into your planning process from day one. When you are finalizing your contract, ask your chosen professional about their recommended maintenance schedule and whether they offer ongoing care programs. A reputable contractor will be eager to help you protect the work they just completed.
For many flexible pavements, routine preventative care is the difference between a surface lasting fifteen years versus thirty years. As the material ages and oxidizes, it becomes brittle, changing color from a rich black to a faded, pale gray. To combat this, you must adhere to a strict schedule of applying asphalt sealcoating every two to three years. This process involves spraying or squeegeeing a protective liquid emulsion over the entire surface. This barrier not only restores the deep, dark, original color, instantly boosting curb appeal, but it also replenishes the essential oils, blocks UV oxidation, and seals the surface against water and chemical penetration.
For commercial property owners, maintenance also heavily involves safety, liability, and legal compliance. A well-maintained surface is only functional if the traffic patterns are clear.
-
Routine Inspections: Plan to walk your surface twice a year—once in the spring to assess winter damage, and once in the fall to prepare for freezing temperatures. Look closely for new hairline cracks, weed growth in joints, or areas where water is beginning to pool.
-
Immediate Crack Filling: If you spot a crack wider than a quarter of an inch, it must be cleaned out and filled with a hot rubberized sealant immediately. Left untreated, water will enter the crack, destroy the sub-base, and turn a five-dollar fix into a massive structural repair.
-
Safety and Visibility: For commercial lots, investing in professional parking lot striping services is not just an aesthetic choice; it is a critical safety requirement. Faded lines lead to chaotic parking, fender benders, and pedestrian accidents. Regular restriping ensures that fire lanes, pedestrian crosswalks, directional arrows, and standard parking stalls are highly visible.
-
ADA Compliance: Furthermore, commercial spaces must strictly adhere to the Americans with Disabilities Act (ADA) guidelines. Crisp, clearly marked handicap-accessible spaces, complete with the proper stenciling, hash marks, and signage, are legally mandated and require precise, professional application to avoid hefty fines and lawsuits.
By dedicating a small fraction of the initial installation cost to routine, proactive maintenance, you effectively lock in the aesthetic beauty and structural strength of your project, saving yourself tens of thousands of dollars in premature replacement costs down the road.
Conclusion
Embarking on a major paving or flatwork project can initially feel overwhelming given the high costs and the immense impact the final product will have on your property. However, as this guide has demonstrated, securing a flawless result is entirely within your control. Finding the best professional is not about luck; it is the direct result of a rigorous, disciplined vetting process. By taking the time to define your exact project specifications before reaching out to the market, you position yourself as an informed client who cannot be easily manipulated.
Never settle for the cheapest option without understanding exactly why the price is so low. Demand transparency, require physical proof of insurance and licensing, and do not hesitate to ask highly technical questions about excavation, base depths, and water management. A true craftsman will respect your diligence and gladly walk you through their engineering process. Remember that a properly installed, expertly maintained exterior surface is not just a sunk construction cost—it is a vital, long-term investment that ensures safety, enhances usability, and dramatically elevates the curb appeal and financial value of your property for decades to come. Use the criteria outlined above as your personal checklist, and you can move forward with total confidence on your next major property improvement project.